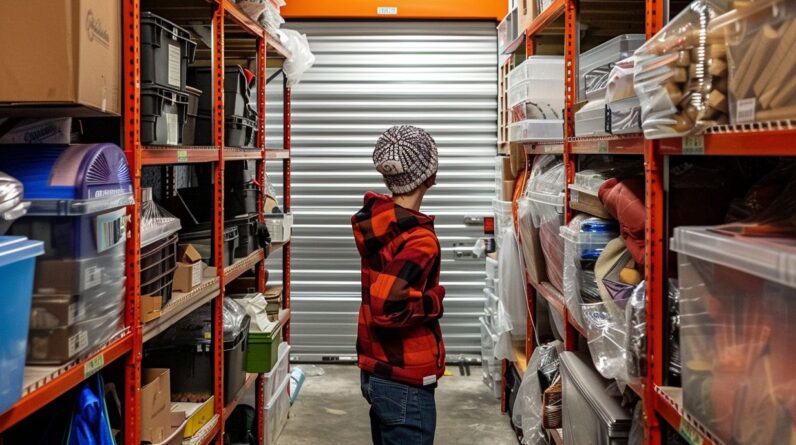
Why Use Self-Storage During Home Renovations?
A home renovation project can quickly turn your living space into a chaotic mess. As walls come down and dust flies, you might wonder where to put all your belongings. This is where self-storage comes to the rescue. It provides a haven for your possessions while your home undergoes its transformation.
Self-storage offers a secure and convenient place to keep your things during the renovation process. It’s like having an extra room that’s not in the middle of a construction zone. In this post, we’ll walk you through everything you need to know about using self-storage during your renovation, from choosing the right unit to efficiently packing and unpacking your belongings.
Keep Your Stuff Safe and Organized
Using a storage unit during renovations has several advantages that can make your life much easier. First and foremost, it helps keep your belongings safe and organized. Instead of cramming everything into one room or trying to navigate around piles of boxes, you can store your items in a dedicated space away from the chaos.
This approach also gives you more space to work with during the renovation. Without furniture and personal items cluttering up the area, contractors have room to move around and work efficiently. This can speed up the renovation process and save you money on labor costs.
Moreover, keeping your renovation areas clutter-free can do wonders for your peace of mind. It’s much easier to envision your end goal when you’re not tripping over boxes or worrying about your favorite vase getting knocked over.
Storage units often come with added benefits like security systems and climate control. This means your valuables and sensitive items are protected from theft, dust, and extreme temperatures. Yet, you can still access your things whenever you need them. It’s a flexible solution that adapts to your renovation timeline.
Protect Your Belongings
When it comes to using a storage unit, protection is key. Start by investing in high-quality packing materials. Sturdy boxes, bubble wrap, and packing tape might seem like an unnecessary expense, but they’re crucial for keeping your items safe during storage.
Before you start packing, take some time to declutter. This is the perfect opportunity to sort your belongings and decide what you want to keep. Not only will this save space in your storage unit, but it’ll also make unpacking easier when your renovation is complete.
As you pack, create a detailed inventory of what you’re storing. This might seem tedious, but you’ll be thankful for it later. A good inventory can help you locate items quickly if you need them during the renovation and ensures nothing gets lost in the shuffle.
Choosing the Right Storage Unit
Selecting the perfect storage unit involves more than just picking a size and signing a contract. There are several factors to consider to ensure you’re getting the best value and service for your needs.
When you’re shopping around for a storage unit, create a checklist to help you compare options. Here are some key things to consider:
Size: Ensure the unit can accommodate all your belongings without wasting space. Many facilities offer a range of sizes, so you can find the perfect fit.
Lease terms: Understand the length of the commitment and any penalties for early termination. Flexibility can be crucial when dealing with renovation timelines that might change.
Payment options: Look for a plan that aligns with your budget and preferences. Some places might offer discounts for longer-term rentals or automatic payments.
Extra charges: Ask about additional fees for insurance, late payments, or access outside normal hours. These can add up, so it’s best to know upfront.
Online booking and account management: Managing your unit online can be a huge convenience. Check if the facility offers these options.
Customer reviews: Take the time to read what other customers have said about the facility. Look for comments about cleanliness, customer service, and security.
Access hours: Consider whether you need 24/7 access to your unit. Some facilities have restricted hours, which might not work with your schedule.
Location: Think about how often you’ll need to visit your unit. A location closer to your home might be worth a slightly higher price for the convenience.
Climate control: If you’re storing sensitive items like electronics, wooden furniture, or important documents, a temperature-controlled unit might be worth the extra cost.
Security features: Look for facilities with good lighting, security cameras, and on-site staff. Some even offer individual unit alarms for added peace of mind.
By considering all these factors, you’ll be better equipped to choose a storage unit that meets your specific needs during your home renovation project.
Getting Your Stuff Ready for Storage
Packing for storage requires more thought than just throwing things into boxes. With some careful planning, you can ensure your belongings stay in great condition and are easy to find when you need them.
Start by gathering high-quality packing materials. This includes sturdy boxes in various sizes, bubble wrap, packing paper, tape, and markers for labeling. While it might be tempting to use old boxes from the grocery store, investing in new ones can provide better protection for your items.
As you pack, consider how you’ll need to access your things. Items you might need during the renovation should be packed last and placed near the front of your unit. Seasonal items or things you won’t need for a while can go towards the back.
Packing and Labeling Tips
When it comes to fragile items, take extra care. Wrap each piece individually in bubble wrap or packing paper. Place these items in the center of boxes, surrounded by softer items or additional packing material for cushioning.
Labeling is crucial for staying organized. Don’t just label boxes with vague terms like “kitchen stuff.” Instead, be specific: “Kitchen – Pots and Pans” or “Living Room – Photo Albums.” This level of detail will save you time and frustration later.
Consider creating a master inventory list as you pack. This can be as simple as a notebook where you jot down the contents of each box, or you could use a spreadsheet or app for a more detailed tracking system.
Making the Most of Your Storage Space
When you’re paying for storage during a renovation, you want to maximize every square inch. With clever packing techniques, you can fit more into your unit and keep everything accessible.
Start by creating a rough floor plan for your unit. Decide where to place larger items like furniture, then plan how to stack boxes and smaller items around them.
Use vertical space to your advantage. Stack boxes, but be mindful of weight – heavier boxes should always go on the bottom. For extra vertical storage, consider bringing in plastic shelving units.
Space-Saving Tricks
Disassemble furniture when possible. Not only does this save space, but it also protects your furniture from damage. Just keep all hardware in labeled bags taped to the corresponding furniture piece.
Utilize hollow spaces. The inside of a dresser, for example, can hold smaller, lighter items. An upright mattress can create a “wall” so you can stack boxes against it.
For seasonal items or things you won’t need frequent access to, vacuum-sealed bags can be a game-changer. They significantly reduce the volume of soft items like clothing and bedding.
Keeping Your Stuff Safe and Accessible
While the primary goal of storage is to keep your belongings safe, you also want to ensure you can access them when needed. Balancing security and accessibility is key to a good storage experience.
Choose a storage facility that offers convenient access hours that align with your schedule. Some facilities offer 24/7 access, which can be invaluable if you need to retrieve something urgently or outside normal business hours.
Invest in a high-quality lock for your unit. While most facilities have overall security measures, your lock is your first line of defense against theft.
Easy Access Strategies
Organize your unit with accessibility in mind. Create aisles so you can reach boxes at the back without moving everything. Consider leaving a folding step stool in your unit to help you reach items stored up high.
Keep an updated inventory list and map of your unit. This can be as simple as a rough sketch showing where major items and groups of boxes are located. Store a copy of this at home and consider taping one inside your unit for quick reference.
Watch Out for These Risks
While storage units are generally safe, it’s wise to be aware of potential risks and take steps to mitigate them. Common issues include theft, pest infestations, moisture damage, and temperature fluctuations.
To protect against theft, choose a facility with good security measures and use a sturdy lock. Some facilities offer individual unit alarms for an extra layer of security.
Pest control is crucial. Check if the facility has regular pest control treatments. You can also use pest repellents in your unit as an extra precaution.
Moisture can be a silent destroyer of stored items. Consider using moisture absorbers in your unit, especially in a humid climate. For valuable or sensitive items, plastic bins with tight-fitting lids offer better protection than cardboard boxes.
Temperature fluctuations affect certain items, particularly electronics, wood furniture, and delicate fabrics. If you’re storing these items, a climate-controlled unit might be worth the extra cost.
Lastly, consider getting insurance for your stored items. Many homeowners or renters insurance policies cover items in storage, but it’s worth double-checking. Some storage facilities also offer insurance options.
Moving Back Home After Renovations
The day has finally arrived – your renovation is complete, and it’s time to bring your belongings back home. With some planning, you can make this process as smooth as the move into storage.
Start by doing one final declutter. As you unpack, ask yourself if each item still fits your lifestyle and the new look of your renovated space. This is a great opportunity to donate or sell items you no longer need.
Before you start moving things back, take the time to clean your newly renovated space thoroughly. It’s much easier to deep clean when the space is empty.
Unpacking and Organizing Tips
Create a plan for where furniture and large items will go. You might want to sketch out a floor plan or use painter’s tape to mark spots on the floor. This can help you or your movers place items correctly the first time, saving time and preventing damage to your new floors or walls.
As you unpack, take the opportunity to set up organizational systems in your new space. Use drawer organizers, closet systems, and storage solutions to give everything a designated place. This can help you maintain the clutter-free feeling of your newly renovated home.
If you have a lot of items to move or if you’re short on time, consider hiring professional movers. They can often complete the job faster and with less stress than doing it yourself.
Lastly, don’t rush the process. Take your time to unpack and organize thoughtfully. This will help you fully appreciate your newly renovated space and ensure that your belongings are placed in a way that enhances your day-to-day life.
By following these guidelines, you can make your renovation process smoother, keep your belongings safe, and set yourself up for success in your newly updated home. Remember, a little planning goes a long way in making your renovation and storage experience a positive one.


